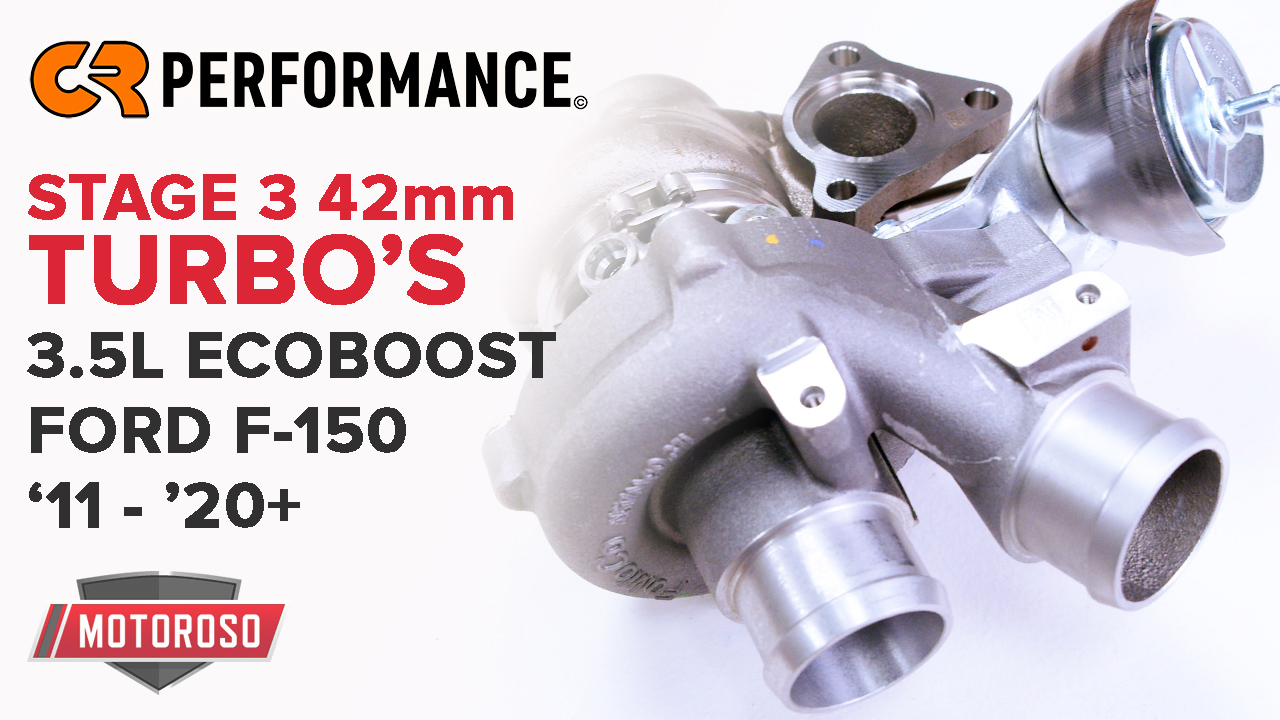
Today we’re going to be installing the CR Performance Full Bore exhaust manifold and the stage 3 42mm twin-turbo upgrade kit on this 3.5L EcoBoost F-150. This thing’s going to be making close to 500 wheel horsepower when we’re done with a custom tune. Now, this is a big install job. It’s going to take quite a while. There are a lot of steps to it. If you’re doing these projects yourself, hopefully, find this video really helpful.
If you’re shopping for the full bore manifold or the turbo kit or any other CR performance products, or all of your mod needs, check us out at www.motoroso.com or call us toll free at 1-833-MOTOROSO (833.668.6767)
Before the installation guide, we made a Product Spotlight video to describe the features and benefits of this kit, read the article and watch that video here:
CR Performance Stage 3 42mm Turbo & Exhaust Manifold Installation Guide for 2011+ F-150 3.5L EcoBoost Video
CR Performance Stage 3 42mm Turbo & Exhaust Manifold Installation Steps
Tools for the job:
- Torx 47 & 50
- 5.5, 10,13,15mm sockets
- Ratchets to match
- Pick
- Panel puller
- Torque wrench
- Start by jacking up the truck and removing the wheels
- Remove the pop clips and retaining screws on the fender liner, and if you have fender flares like us, you’ll need to remove those as well
- Remove the fender liner
- On the driver side, there’s a slight difference in the fender liner due to all the electrical connectors are clipped into it, they can easily be popped out from the engine bay side
- Ziptie or bungee the wires up
- Drain the coolant from the petcock on the driver side of the radiator
- While the coolant is draining, disconnect the battery
- On the passenger side of the engine, you have to remove the starter in order to have enough room to access the lower side of the turbo.
- Remove the 2x 13mm bolts on the backside of the bell housing
- Begin removing the intake and intercooler silicone hoses with a 7mm socket
- You may have to remove more of the intake to get the inlet boot off the turbo. For maximum clearance on both sides, we suggest removing the full intake
- The mounting bolts on the turbo can be stiff due to the intense heat cycling, spray them down with penetrating oil and let them sit while taking all the lines off the turbo
- Remove the 2x 15mm nuts for the downpipe
- Simply pull off the wastegate vacuum hose
- On the underside of the turbo, there is one coolant line held in by a C-Clip and the oil drain held by 2x Torx 50’s
- Now on the top side of the turbo remove the c-clip holding the other coolant line into the turbo
- With all the lines removed the turbo is ready to come out, remove the 3x torx47 bolts mounting the turbo to the exhaust manifold and remove the turbo
- Some extensions and swivels will be needed to get the angles needed to remove the 8x 15mm nuts from the exhaust manifold.
- Now repeat almost all of these steps on the driver side starting with the intake and intercooler boots moving to the downpipe 15mm nuts then the 2x coolant lines, on the driver side do not remove the line from the back of the turbo but from the engine block instead by removing the torx47 retaining bolt on the tab and simply pulling it out of the block. Then remove the c-clip from the top coolant line finishing with the torx50s on the oil drain and torx47s on the exhaust manifold mount
- Remove the turbo from the engine bay and get to work on the 8x 15mm nuts for the exhaust manifold
- with a pair of channel, locks remove any broken studs left in the engine block and any non-broken studs will use a 5.5mm wrench or socket
- Clean the engine block with some brake clean and a rag
- Install all new studs into the engine block with a 5.5mm socket
- Install a new gasket onto the studs
- Install the new CR Performance exhaust manifolds with the supplied nuts
- Follow the supplied directions from CR Performance for your specific vehicle for the order and final torque of the manifold nuts
- Prep the turbo to be installed installing the mounting gasket and downpipe backing plate. We recommend buying new backing plates from Ford as well as new downpipe studs. On the passenger side install the coolant line to the back of the turbo being held in by a c-clip
- Install the new CR Performance turbo to the exhaust manifold, we recommend getting new Torx 47s mounting bolts rather than reusing the old stock ones
- With the turbo loosely mounted install the oil drain with a new gasket torquing to 10 lb/ft, connect the 2 coolant lines by pressing them into place and line up the downpipe before fully tightening down the turbo to its final torque of 38lb/ft
- Now to the passenger side to repeat the process, cleaning the block of any excess carbon build-up. installing the studs first followed the new header gasket and CR performance manifold.
- With the manifold installed, Loosely Install the new CR Performance turbo connecting the coolant lines and oil lines first followed by the downpipe, and finally tightening up the mounting torx 47s to 38lb/ft
- With the turbo fully plumbed and torqued in place install the intercooler and intake couplers re-using the OEM hardware
- Re-install the starter re-using the OEM 13mm nuts
- Before re-Installing the fender liners fill with coolant and connect the battery, then start the truck to make sure everything is operating properly and you have no leaks of exhaust, oil or coolant.
- If there are no leaks re-install the fender liners making sure to connect the electrical connectors on the driver side install the wheels and put it down on the ground ready to be re-tuned to make some power
When you want to shop for CR Performance turbo upgrade, the full bore exhaust manifold, or any of your product needs. Check out www.motoroso.com or call us toll-free at 1.833.MOTOROSO (833.668.6767). We’ve got over a million top name-brand products sold by trusted vendors at great prices. And our shipping is always free with no minimum.