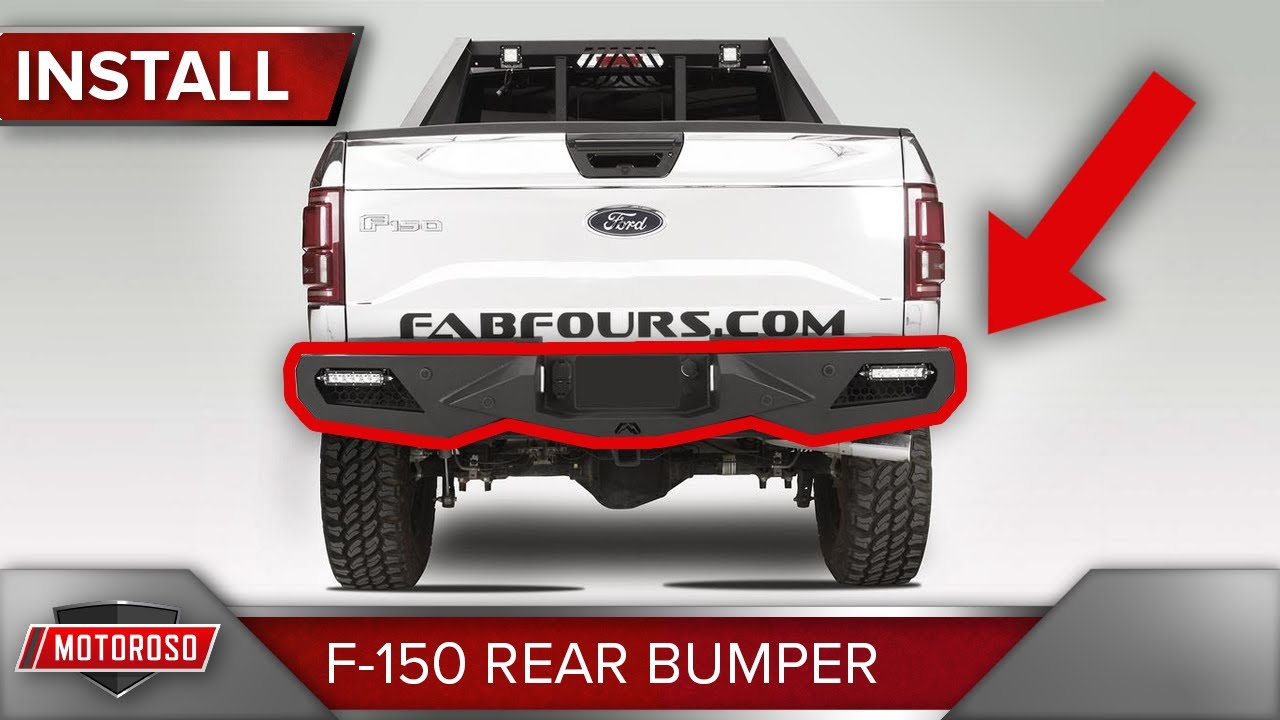
How to Install A Rear Bumper on the Ford Raptor – Fab Fours Vengeance Series
We’re going to be installing the Fab Fours Vengeance Rear Bumper with 6” led lights, and this is your installation guide. We made a product spotlight about the bumper in another article, so make sure to check that out if you’re interested in learning more about this bumper. Of course, you can shop for this bumper and over a million top name-brand products sold by trusted vendors at great prices, and the shipping is always free with no minimum at Motoroso.com. Let’s get started.
VIDEO: HOW TO INSTALL A REAR BUMPER ON THE FORD RAPTOR
Tools you’ll need for this job include:
- Torx 45
- Ratchet
- 16mm Socket
- 6” extension
- 16mm combo wrench
- Flathead Screwdriver
- Panel Puller

HOW TO INSTALL REAR BUMPER
- Remove the license plate from your OEM bumper.
- Use the hidden key within the key fob to remove the spare tire access hole plug.
- Remove the seven-way connector by reaching behind the bumper and pinching the clips and pushing it through the bumper, then simply press down on the connector and disconnect.
- Begin removing the bumper by pulling up on the plastic bumper cover, making sure not to damage your reverse sensors.
- Disconnect the (2) license plate lights and the (2) reverse sensor wiring harnesses, leaving the sensors in the bumper cover
- Remove the (6) 45 Torx bolts across the front of the bumper followed by removing the (3) 45 Torx bolts from the backside on each side of the bumper.
- Remove the wiring harness for the reverse sensors with the bumper removed from the chassis on both sides.
- Transfer the (4) reverse sensors over to the new Fab Fours bumpers with the OEM housing, using a flathead screwdriver to press the OEM housings out of the OEM bumper.
- Line up the housings correctly and press them into your new Fab Fours bumper.
- To install the new license plate lights, cut back the wire sheathing revealing the blue and black wires.
- Connect the supplied lock splice connectors and press the supplied red wire to the blue wire, and connect black to black.
- Install the new license plate lights in the Fab Fours bumper using the supplied 3mm Allen and 10mm nut.
- Unclip the remainder of the wiring harness from both sides of the chassis to have a little bit more freedom when plugging everything back in once the bumper’s installed.
- Begin the bumper install by plugging in the license plate lights.
- Remove the (2) OEM mounting brackets with a Torx 45 socket.
- Hang the bumper in a position by letting it sit on the OEM tow bar.
- Line up the bolt holes and slide the supplied 16mm nuts and bolts, making sure to have the washer, then crush washer, on the nut side.
- With all the bolts in place, move the bumper into the desired position and begin tightening down the mounting bolts using a 16mm open-end wrench and a 16mm socket.
- With the bumper tightened down, begin plugging in the wiring harness on both sides of the bumper and zip tie the excess wire up and out of the way.
- Plugin the seven-way connector and press it back into the bumper until it clicks.
- Reinstall the spare tire plug by using the hidden key in your key fob
- Make sure to pop in the (4) clips for the license plate and you’re all done with your install.
All right, that wraps up the installation of the Fab Fours Vengeance Rear Bumper on the Ford Raptor. And of course, you can shop for all your parts and accessories at Motoroso.com, where you can browse over a million top name brand products sold by trusted vendors at great prices, and the shipping is always free with no minimum.
VIDEO: HOW TO INSTALL FRONT BUMPER ON THE FORD RAPTOR
VIDEO: FAB FOURS VENGENCE SERIES BUMPERS FOR THE FORD RAPTOR
We’re totally stoked about how this vengeance rear bumper looks, but unfortunately, we weren’t able to install the 6” light bars since they just didn’t fit. So we’re going to measure those up and find another set that fits and installed those a little later. Thanks for reading.