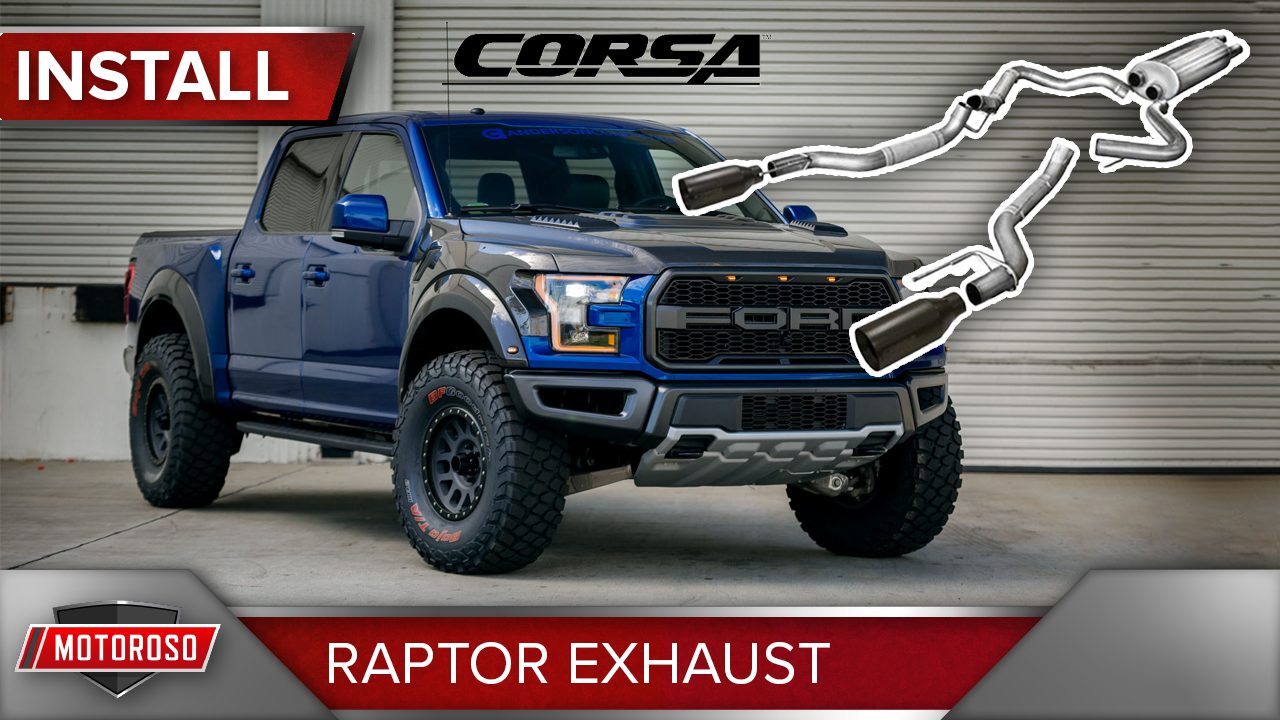
Today we’re gonna to do an installation guide on the cat-back exhaust system on a 2017-2021 2nd Generation Ford Raptor with a 3.5 liter EcoBoost, we’re going to be installing the Corsa Sport Cat-Back Exhaust (14397 / 14397GNM / 14397BPC), and Extreme Resonator Delete X-Pipe (14396)
When you’re looking to purchase these parts, visit www.motoroso.com, reach us on live chat, or call us at 1.833.MOTOROSO (1.833.668.6767).
We’ve laid out the steps below, but you can also watch the Corsa Sport Exhaust install guide video here:
2017-2021 FORD RAPTOR EXHAUST INSTALLATION STEPS:
- Remove the transmission drip tray pan with the 5x 13mm bolts
- Remove the 4x 13mm bolts from the transmission brace
- Support the transmission with a jack stand
- Remove the transmission cooler line bracket by removing the 2x 10mm bolts from the transmission cross member
- Undo the 2x 21mm nuts from the transmission cross-member
- Remove the resonator from the downpipe using the 15mm bolts and 15mm nuts for the clamp
- In cases with extreme rust where the pipes don’t come apart, a grinder will be needed to cut off the clamp
- Use penetrating oil on all the metal clamps
- Disconnect the exhaust clamps at the joints using a 15mm socket
- After the muffler, the exhaust clamp has an extra safety bracket that needs to be bent back to release the exhaust pipe from the muffler
- Disconnect all the exhaust hangers from the muffler back using a 10mm socket
- Undo the front muffler hanger by removing the 2x 10mm bolts and rear hanger with a 10mm
- Undo the 3x 15mm nuts connecting the muffler to the resonator and remove the muffler
- Re-install the rear hanger for the muffler
- Now remove the transmission cross-member by removing the 4x 15mm bolts and 2x 10mm heat shield bolts
- Disconnect all 4x O2 sensors: 2 in the engine bay and 2 underneath
- Disconnect the 4x 15mm bolts from the turbo downpipes and the 4 15mm bolts from the transmission mount
- To remove the heat shield on the passenger side to gain full access to the 15mm bolts for the transmission bolts
- Remove the downpipe assembly from the truck
- Using a 22mm wrench to remove the O2 sensors from the OEM downpipe and transfer them to the new downpipe making sure to transfer them to the same port on the new downpipe
- Transfer the transmission mount to the cross over pipe on the new downpipe
- Install the cross over pipe and driver side downpipe starting with the transmission mounting bracket re-using the 4x 15mm OEM bolts
- Hang the downpipes on the back of the turbos making sure to line them up to the cross over pipe loosely tightening up the downpipes to the turbo
- install the downpipe into the cross over pipe and tighten down the clamp on the crossover pipe using a 15mm socket
- Slide the final piece of the new downpipe into place and tighten the 2x 15mm clamps and fully tighten the downpipes to the turbos
- With the downpipe fully tight and alined install the resonator x-pipe into the downpipe reusing the OEM downpipe bolts
- Reconnect the O2 sensors, 2x below and 2x in the engine bay, and the heat shield for the downpipe re-using the 10mm bolts
- Re-install the transmission cross member re-using the 4x 15mm bolts and nuts, jacking the cross member into place may be needed to properly align the bolt holes
- Tighten down all 4x 15mm bolts to hold cross-member up and tighten the 2x 10mm mounting bolts for the heat shields onto the cross member
- Tighten the transmission mounting point to the cross member re-using the 2x 21mm nuts
- Re-install the transmission cooler line to the cross-member reusing the 2x 10mm bolts
- Re-install the under guard re-using the 5x 13mm bolts
- Re-install the transmission mount support bracket re-using the 4x 13mm bolts
- With the front back together continuing installing the rest of the exhaust, adding the extension pipes for the x-pipe using the supplied clamps
- Install the muffler by sliding it into the rear hanger first then into the x-pipe re-using the OEM clamps
- Install the front muffler hanger re using the 2x 10mm bolts
- Install the last two exhaust pipes using the supplied clamps starting by re-installing the exhaust hangers using a 10mm socket
- Install the passenger side pipe into the hanger first then loosely install the pipe onto the muffler using the supplied clamps
- When installing the pipes coming from the muffler make sure to put the heat shield is pointed towards the tire
- Install the exhaust tips using the supplied clamps align the tips to the cutouts on the bumper and tighten all the joint clamps from the tips to the muffler
When you’re ready to shop for these parts, please come to www.motoroso.com, where you can browse over a million top name brand products. We’ve also got toll free support at 1.833.MOTOROSO and we’ve got live chat on the website. We’re here to help you find and buy the parts that you need.
To learn more about these products, and to hear the sound of the exhaust system, check out the article and video over here: