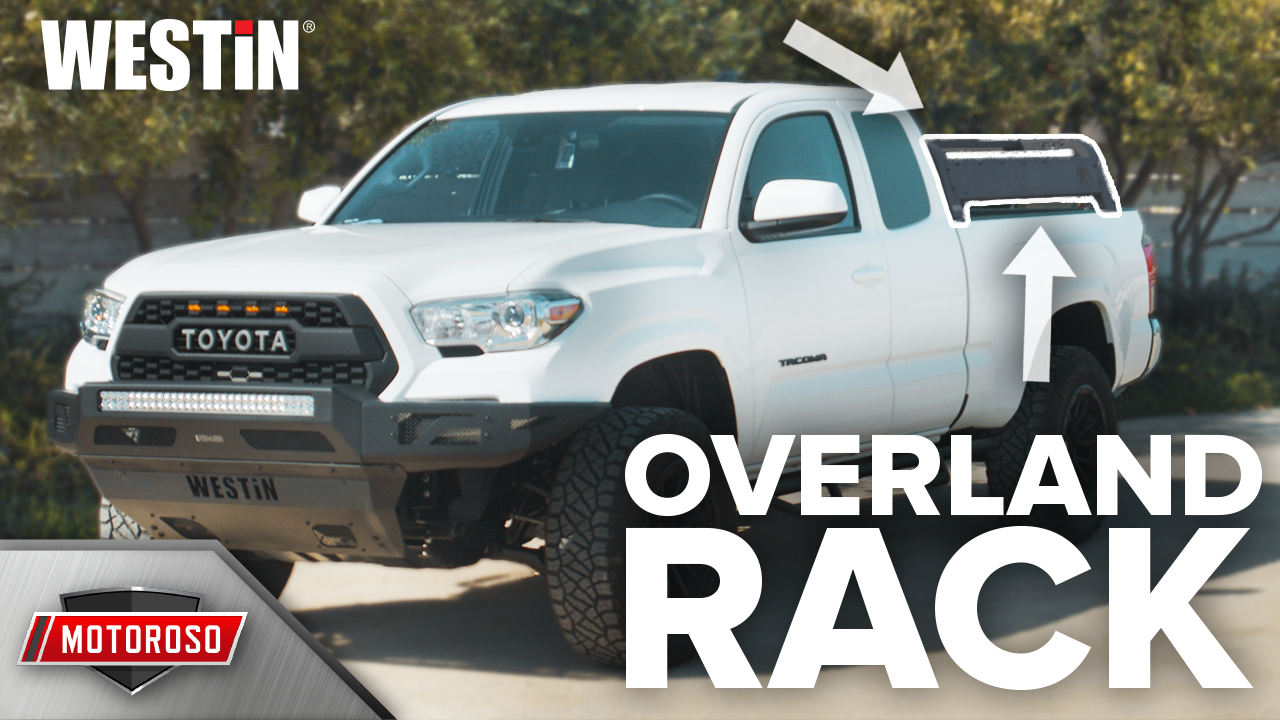
Westin Overland Cargo Rack for the 15-21 Toyota Tacoma
In this article, we talk about our buddy Aaron’s base model 2021 Toyota Tacoma on which we have recently installed the Westin Overland Cargo Rack. If you’re looking to build up a truck for overland adventures, put up a tent, carry tools, fuel, and all those good things that you need for backcountry adventures, you’re gonna need one of these Overlanding racks.
VIDEO: WESTIN OVERLAND CARGO RACK SPOTLIGHT AND INSTALL
These things can get kind of expensive and I want to highlight this one for you because this Westin rack is available in 45” or 57” length depending on the bed length that you’ve got. It’s only $858, it’s made out of 14 gauge steel, and it’s black powder-coated so it’s tough and it’ll handle all the weight that you can put on it. It also sits below the roofline by about 12” which is going to accommodate most rooftop tents to sit below the roofline so that you don’t get all that wind noise, drag, and decrease in fuel economy. It’s super easy installation—no drilling, no cutting, it was a bolt-on we’ll show you that in just a second, and of course if you want to purchase this rack you can check it out at Motoroso.com.

Installation Guide
- Begin your assembly by sliding the vertical mounts into the crossbars.
- On one side secure the crossbar using the supplied hardware and the backing plate, leaving the other side free to adjust.
- Pop-out the end plugs on the factory bed rails.
- Using a Torx bit, remove the first screws behind the bed rail to make room for the bed rail plates. You’re going to put this screw back.
- Insert bed rail plates into the bed rail.
- Reinstall the Torx screw and pop the end of the plug back in.
- Slide the little plastic spacers over the bolts and repeat this on all four corners of the bed rails.
- Place your crossbar assembly on the bed rail hardware and then extend the loose side of the rack into the bolts on the opposite side to ensure the proper placement. Make sure the overhang portion of the mounting plate on the crossbars closest to the cab faces towards the tailgate, and on the crossbar section closest to the tailgate, the overhang portion should face towards the cab.
- On the adjustable side of the crossbar, install the fastening hardware loosely so you can make adjustments if needed.
- Loosely snug the supplied nuts onto the bed rail bolts.
- Install the side plates and fasten them into place using the supplied hardware. This determines the proper length of your rack.
- Slide the rack on the bed of the truck to your desired position then tighten the bed rail mounting hardware.
- Install the upper support bars using the supplied hardware. If these holes do not line up recheck the alignment of your crossbars.
- If everything looks all good, tighten down all your hardware and now you’re done with your overland rack installation.
Of course, you can purchase your Westin Overland Cargo Rack at Motoroso.com that link is in the description, or call us at 833.668.6767 and we’ll get you hooked up. Next up, check out the installation of the Smittybilt Gen2 Overlanding tent article where we’re going to talk about that product as well as show you how to install it. For under $1,500 a three-person Overlanding tent is a great deal. Thanks for reading.